Hey There, In this article, how to install the all-new Windows 11 right on your PC in the simplest way possible.
Back in the day, Microsoft claimed that Windows 10 would be the ultimate final windows operation system, and all the updates will be given to the same. They then wanted to bring out a competition for the Chrome OS, and to keep up the word they announced the name as Windows 10x.
Here, every PC has a somewhat different method to get into BIOS settings. Some PCs get into BIOS settings by F12, for some it is F2. In my case, hitting the DEL button made the work. If you don’t know the BIOS key for your PC, try hitting each one of them or google the same.
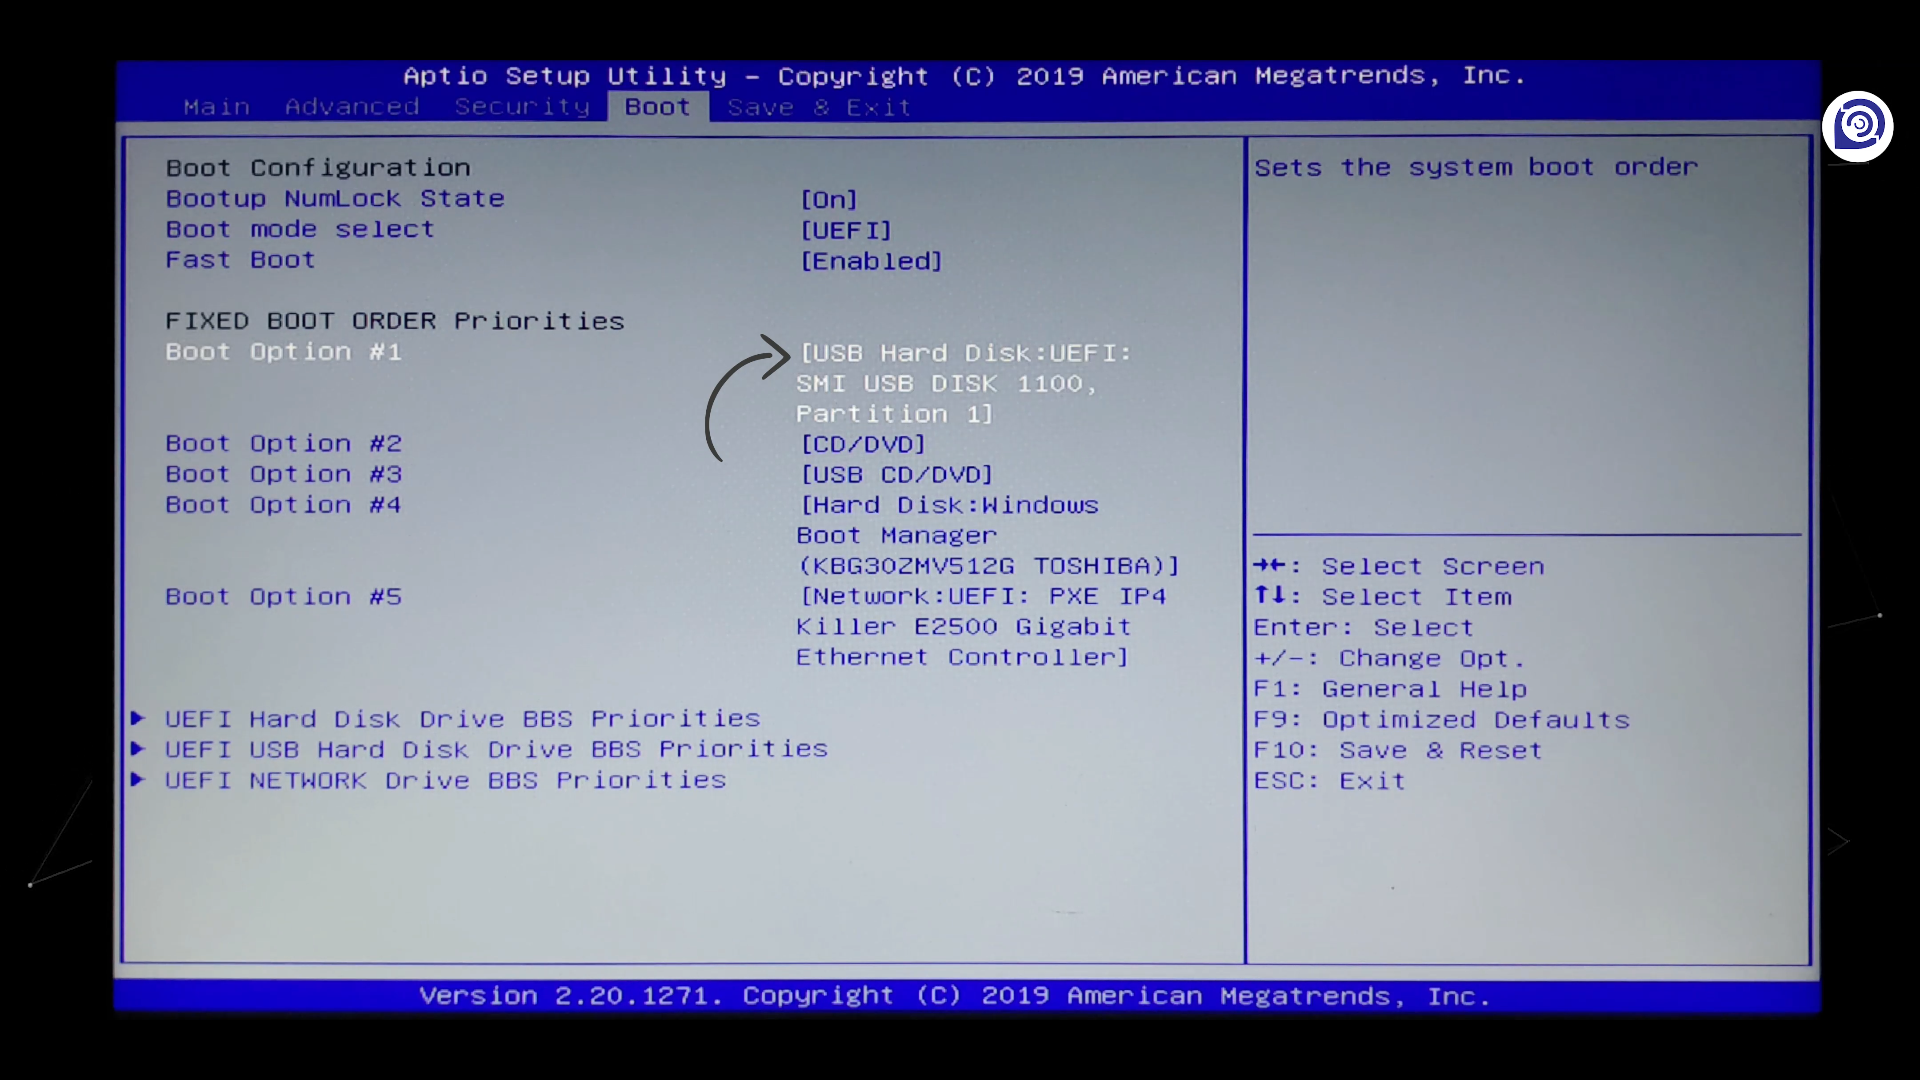
Now, you have to enable the ‘USB Boot’ option in the BIOS settings if disabled and prioritize your Pendrive over other devices available. To do that, get into the ‘Boot’ menu and find where you can set the device priority for booting.
As I said earlier, all the BIOS are different depending on the motherboard manufacturer. Some devices directly have ‘Boot Manager’ or ‘Boot Menu Property’ to change the first boot device.
After finding the same, set your Pendrive to be the first boot priority over the other devices available.
As mentioned before, we have to control and save the changes via the keyboard with the help of on-screen instructions. Once done, save the changes and restart your PC.
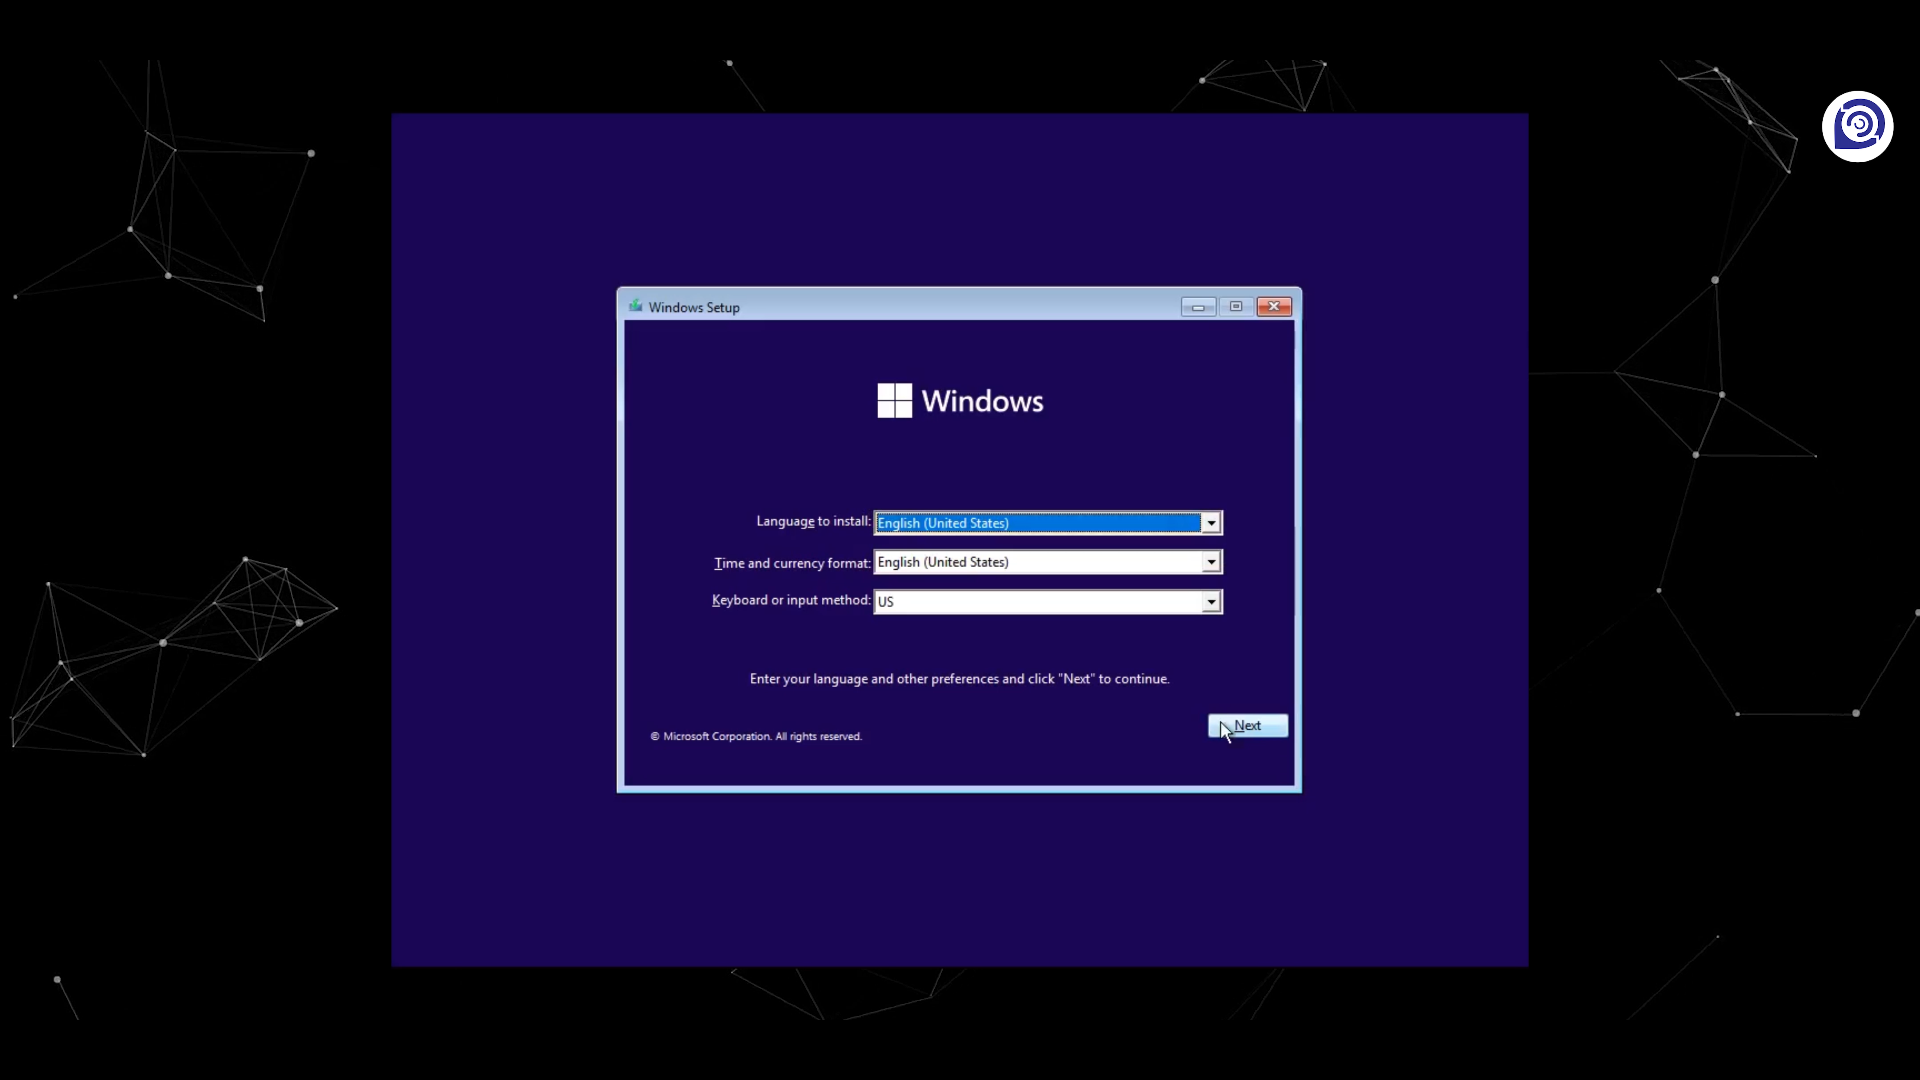
Give it a couple of seconds and you would be taken to the standard Windows installation wizard. Select the installation language and click ‘Next’.
Click on the ‘Install Now’ and enter the product key in the field, or, if you want to continue unregistered select ‘I don’t have a product key’ option.
Here we can see all the editions of Windows 11 listed. Select your preferred Windows edition.
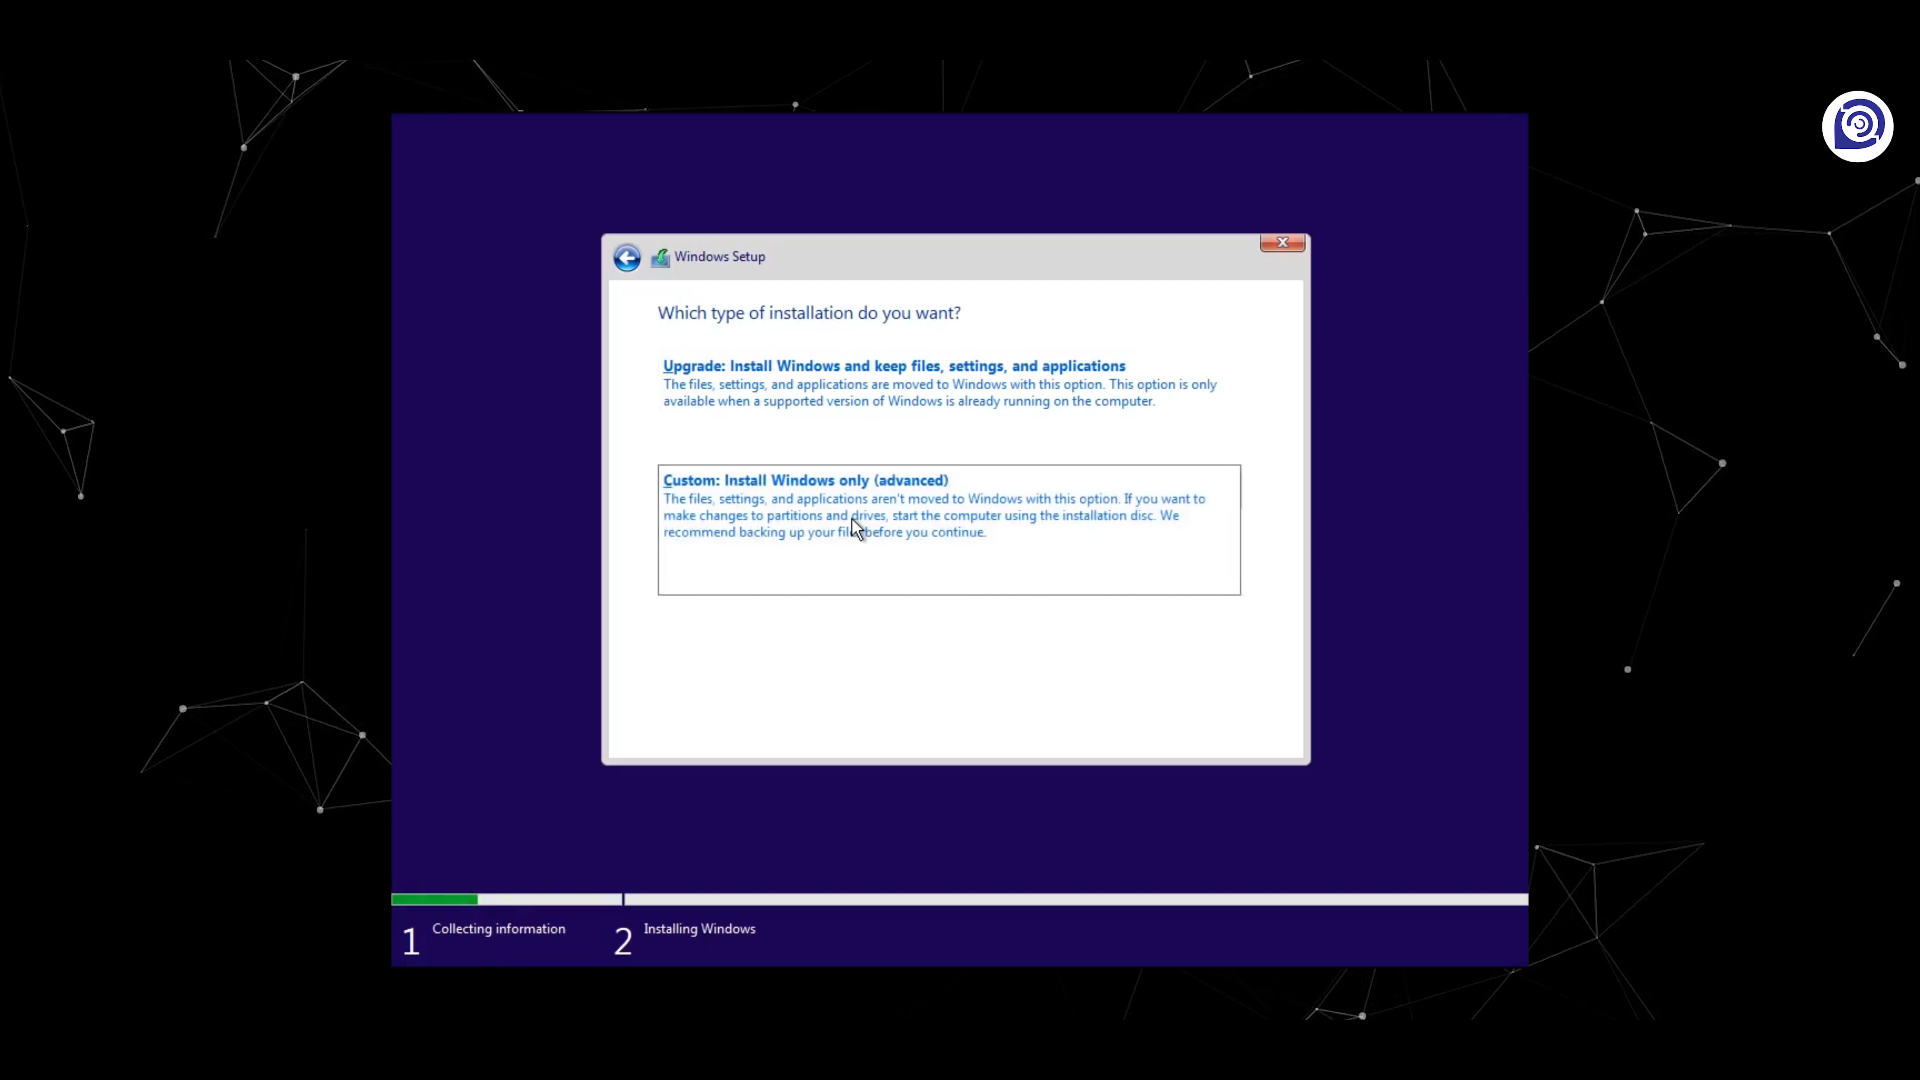
Click on the ‘Custom: Installation’ option as we don’t already have Windows 11 installed.
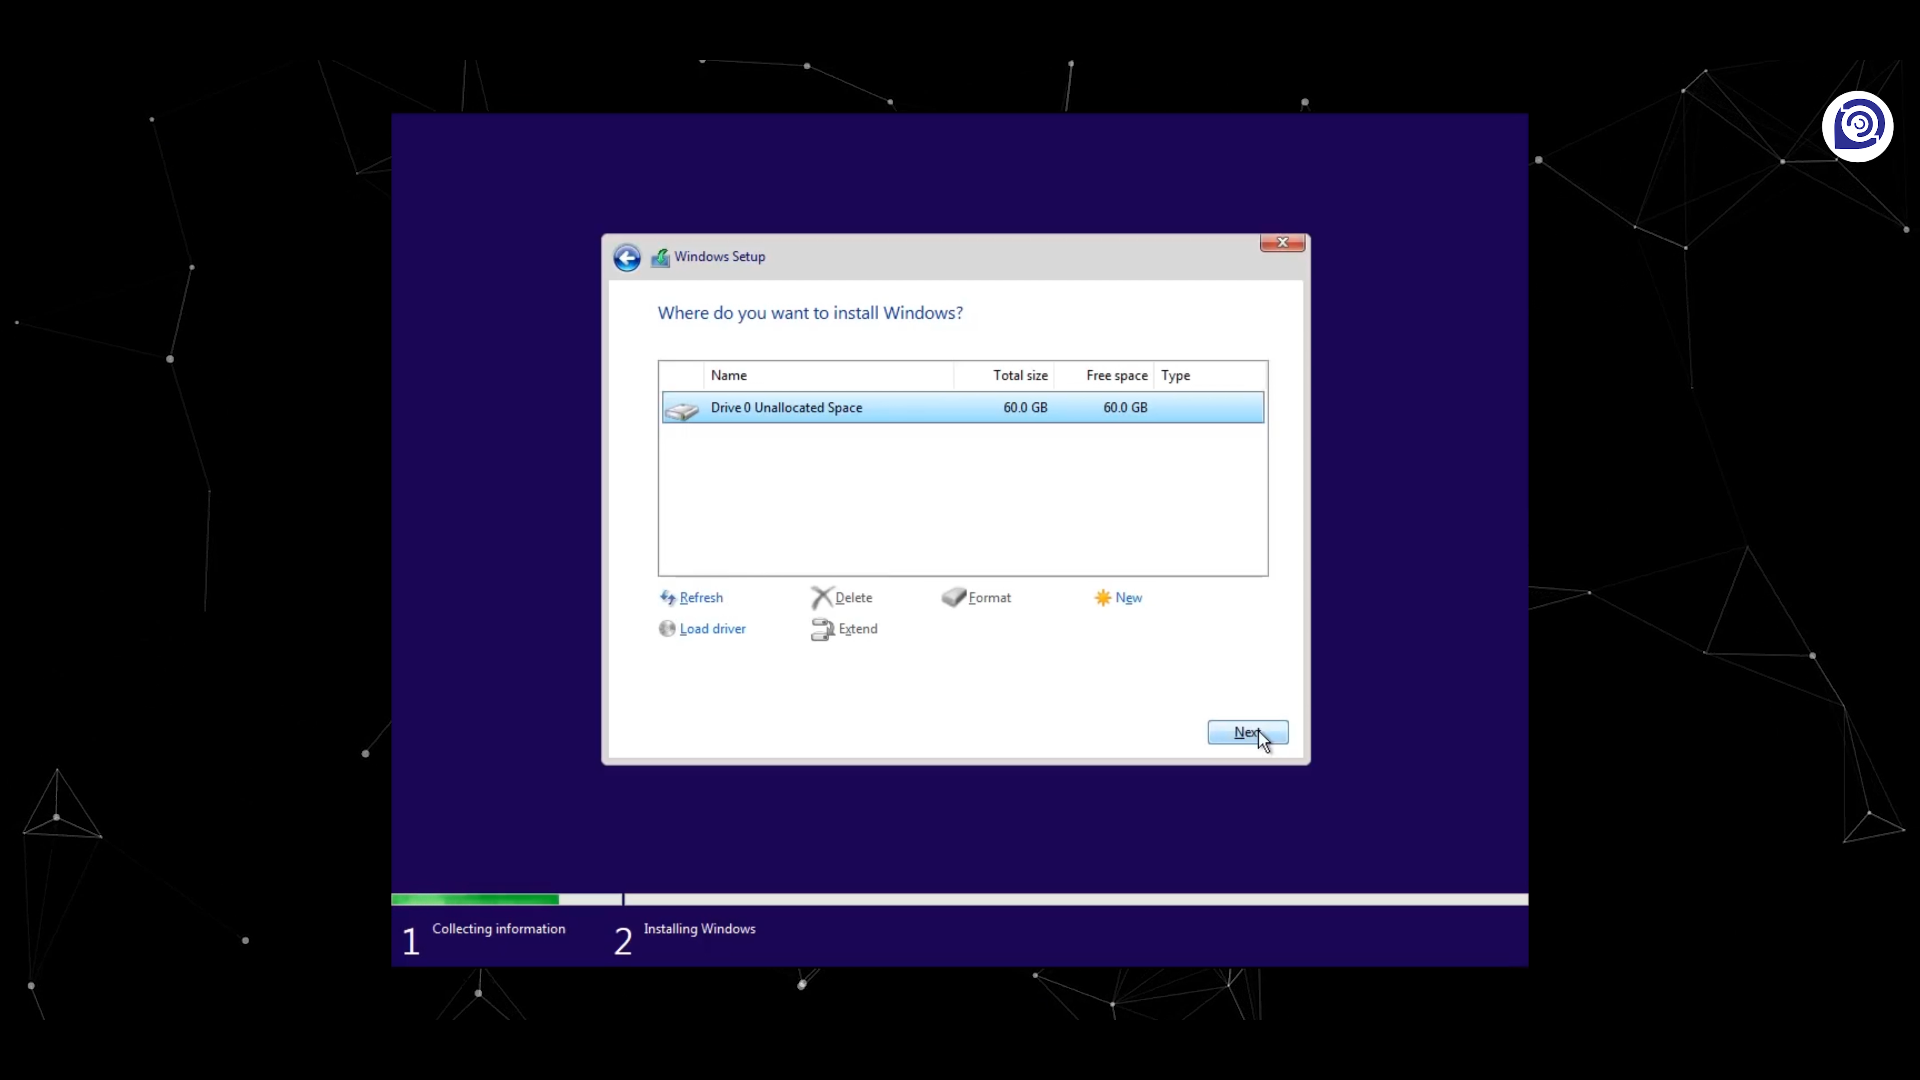
Select the disk you want to install Windows 11 on and click ‘Next’.
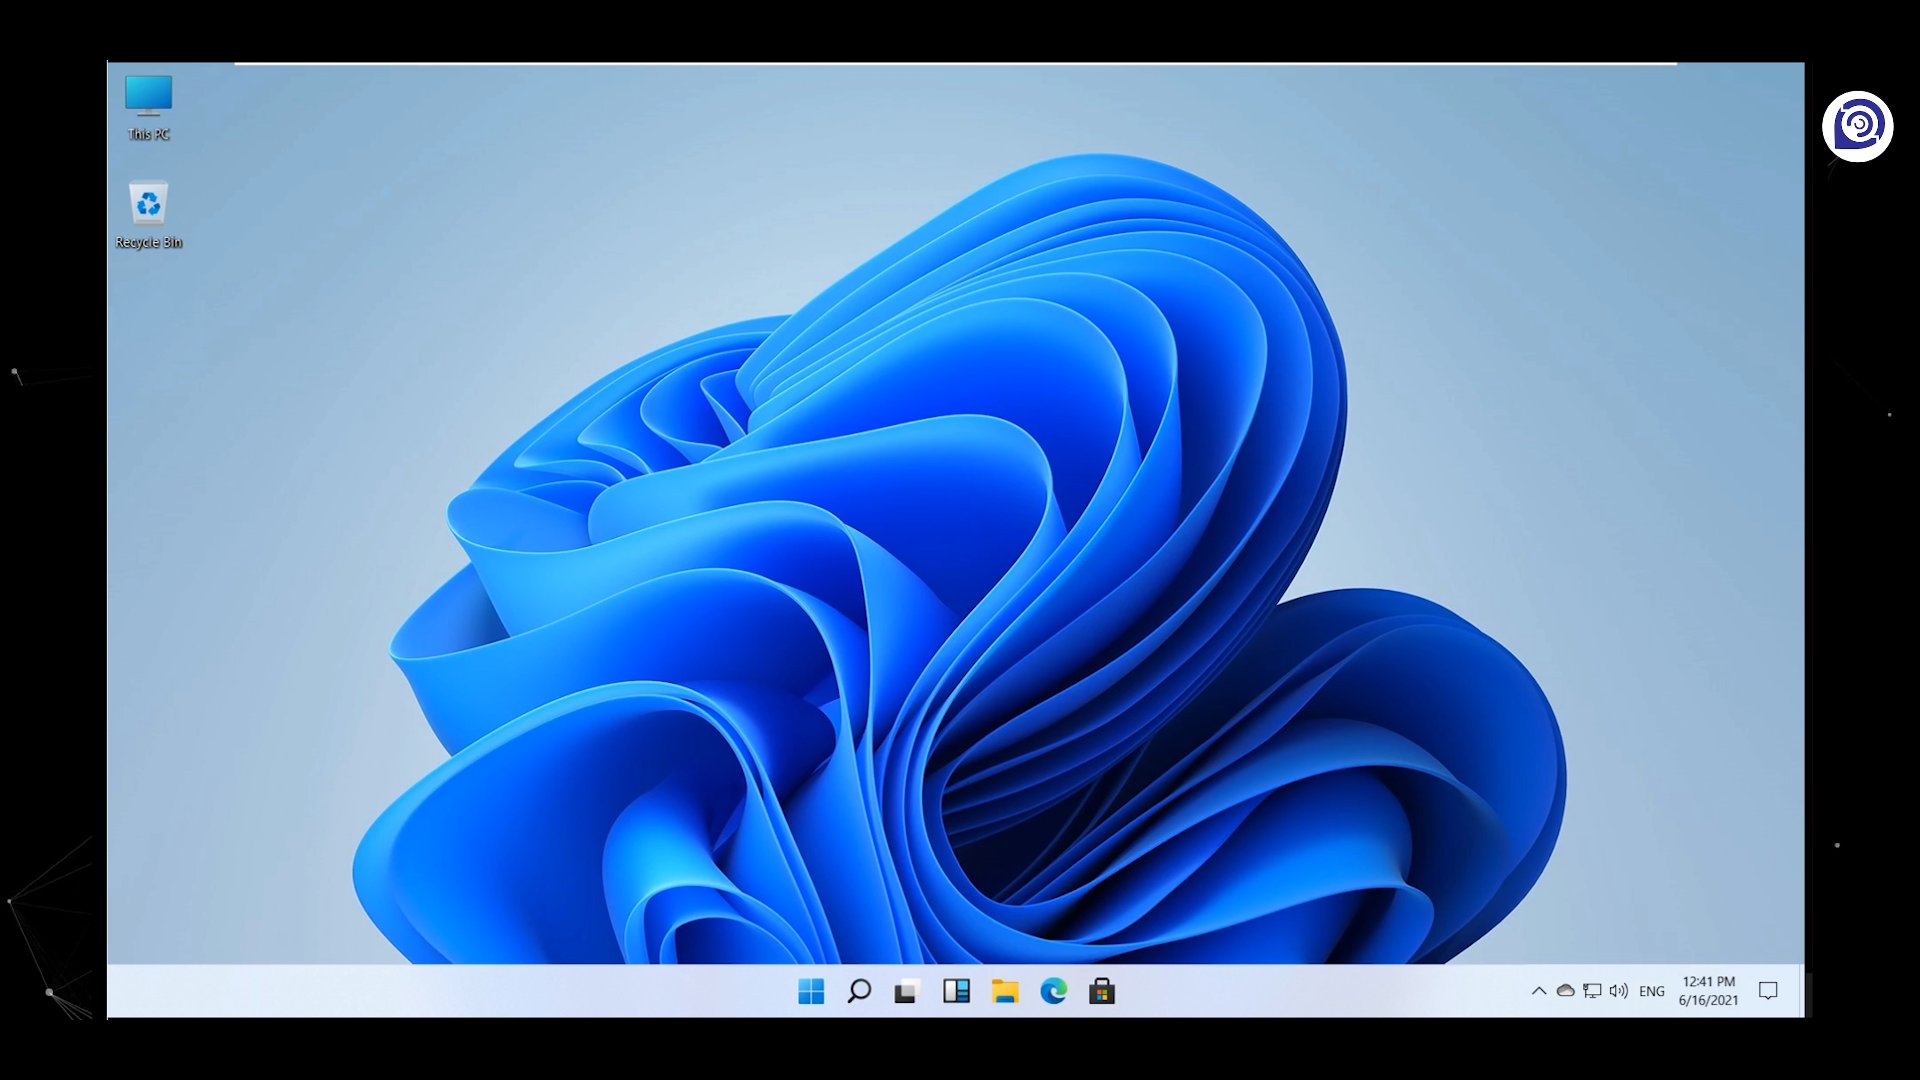
After restarting you can see the updated Windows logo. Once everything loads, you can continue with the setup.
The setup process is pretty fluid and the graphic animations are smooth. The animations are way better than Windows 10 for sure.
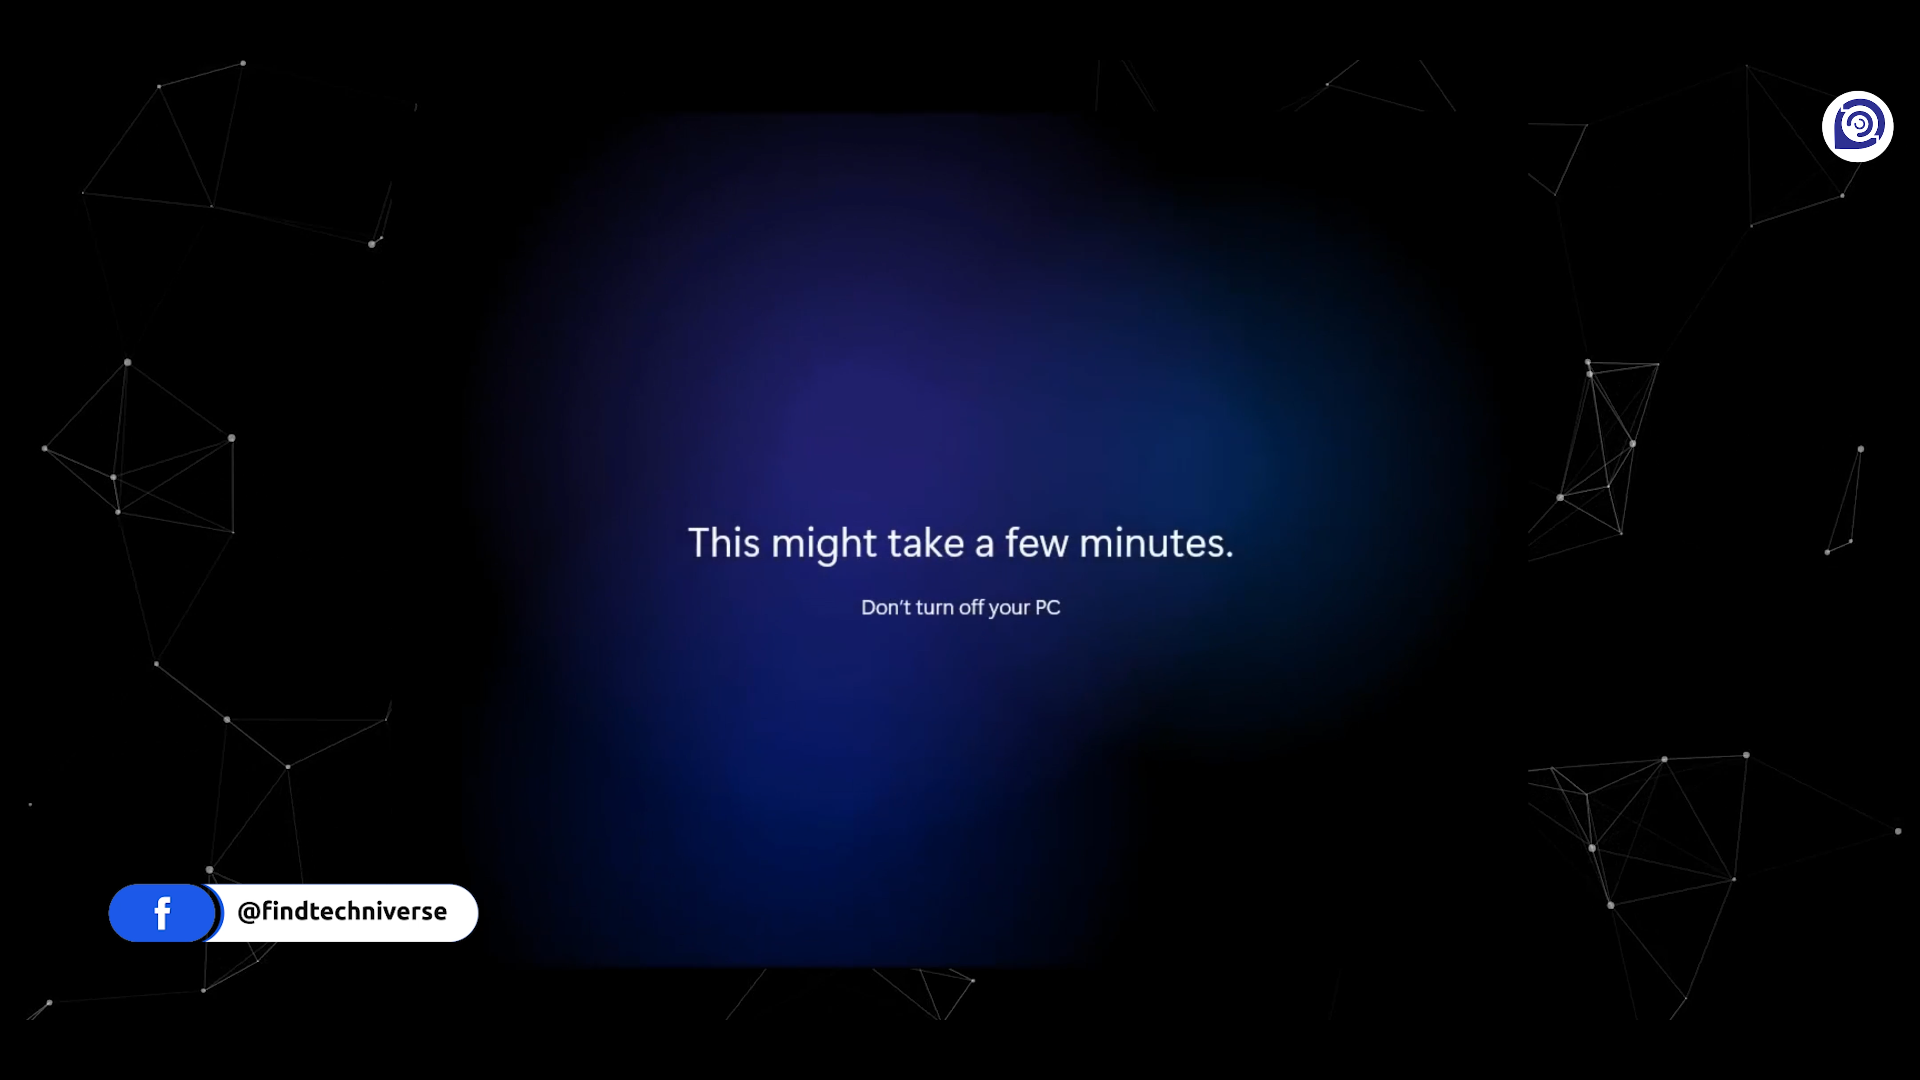
Select your preferred settings for Windows accordingly by following the on-screen instructions. Again give it a couple of seconds to load the things for the first time. Here we can see the updated waiting page with animated particles in the background.
Back in the day, Microsoft claimed that Windows 10 would be the ultimate final windows operation system, and all the updates will be given to the same. They then wanted to bring out a competition for the Chrome OS, and to keep up the word they announced the name as Windows 10x.
Later the same got canceled and some of the features and its resources are to be shifted to Windows 10.
But to keep up the hype, they are about to release the same with the name Windows 11.
So Basically, Windows 11 is just a combination of Windows 10x features on an upgraded Windows 10.
So Basically, Windows 11 is just a combination of Windows 10x features on an upgraded Windows 10.
Anyways, if we are done wasting time.
Let's just keep all the things aside and Let the tech begin!
Prerequisites
The required items to install Windows 11 are,
- A Pendrive with at least 8 GB storage
- The iso file of Windows 11.
- A Bootable Pendrive creator, which in this case is Power ISO.
.
You can download the initial leaked Windows 11 iso file from GDrive 01 / GDrive 02 / Mega 01 / Mega 02.
You can download the latest official Windows 11 iso file from here.
Process
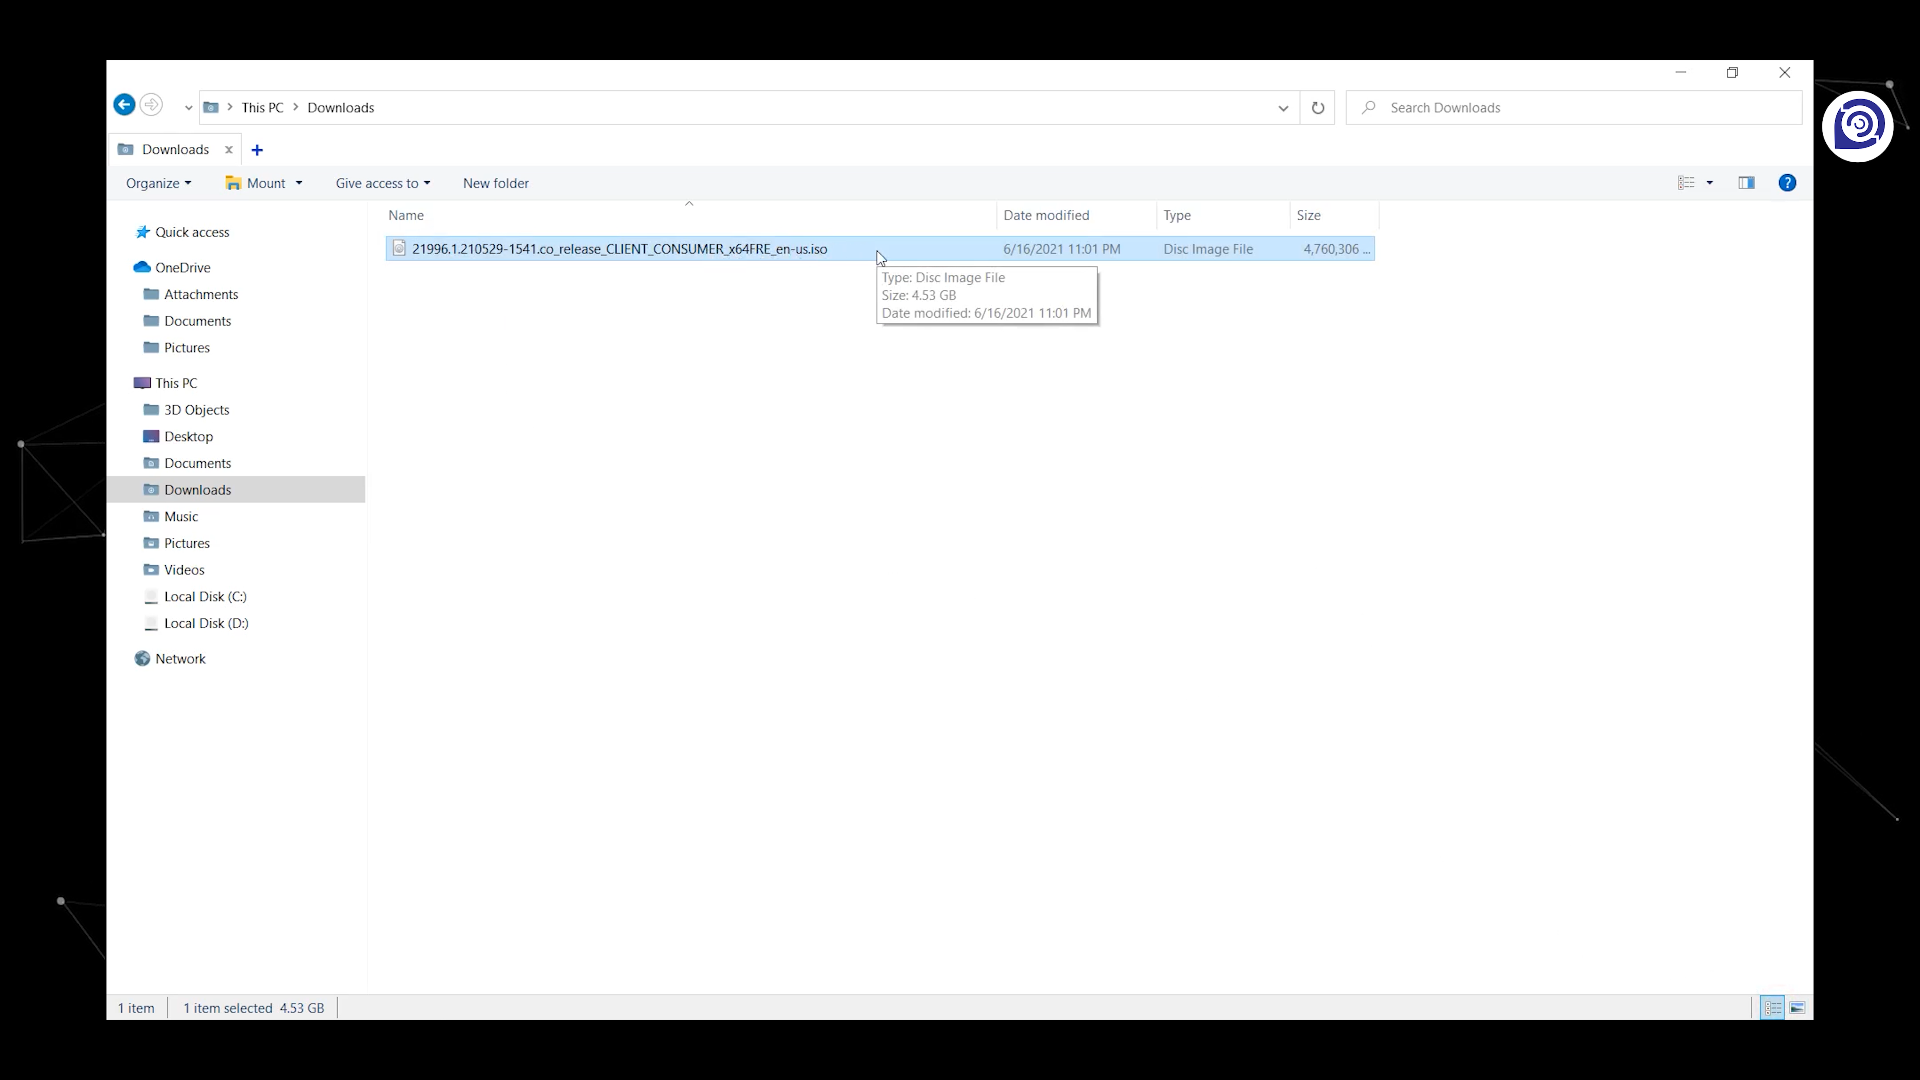
Once you download the ISO file, make sure you check the details of the downloaded file by verifying the file extension to be .iso and the file size to be 4.53 GB. Make sure you have the same file and not a corrupted one or a virus.
Download the Power ISO setup file from the above link. Double click on the setup and complete the installation by hitting next a couple of times.
Once done, you would be seeing a shortcut for the same on your desktop, if for some reason you don’t, just search Power ISO in the search bar and run the program ‘as administrator’.
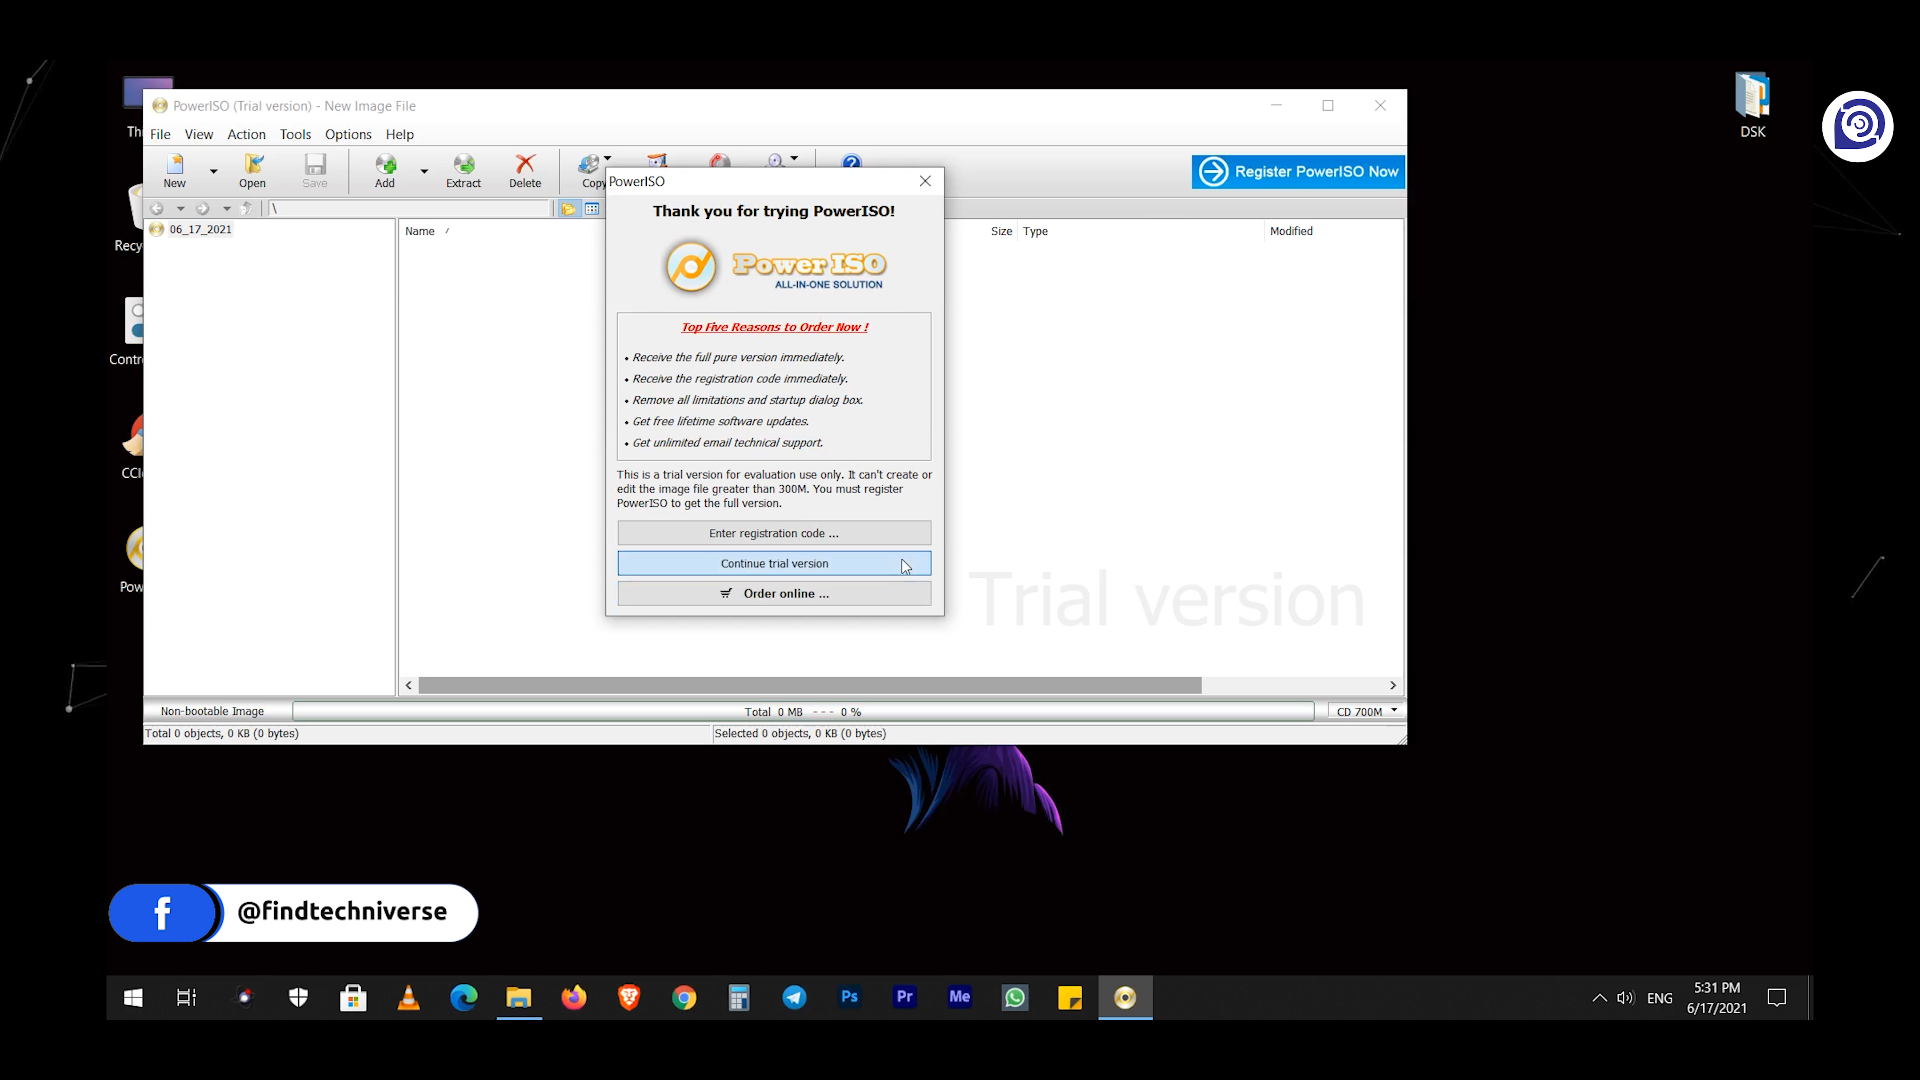
You would be getting this prompt to wait for a couple of seconds and click on ‘Continue trail version’.
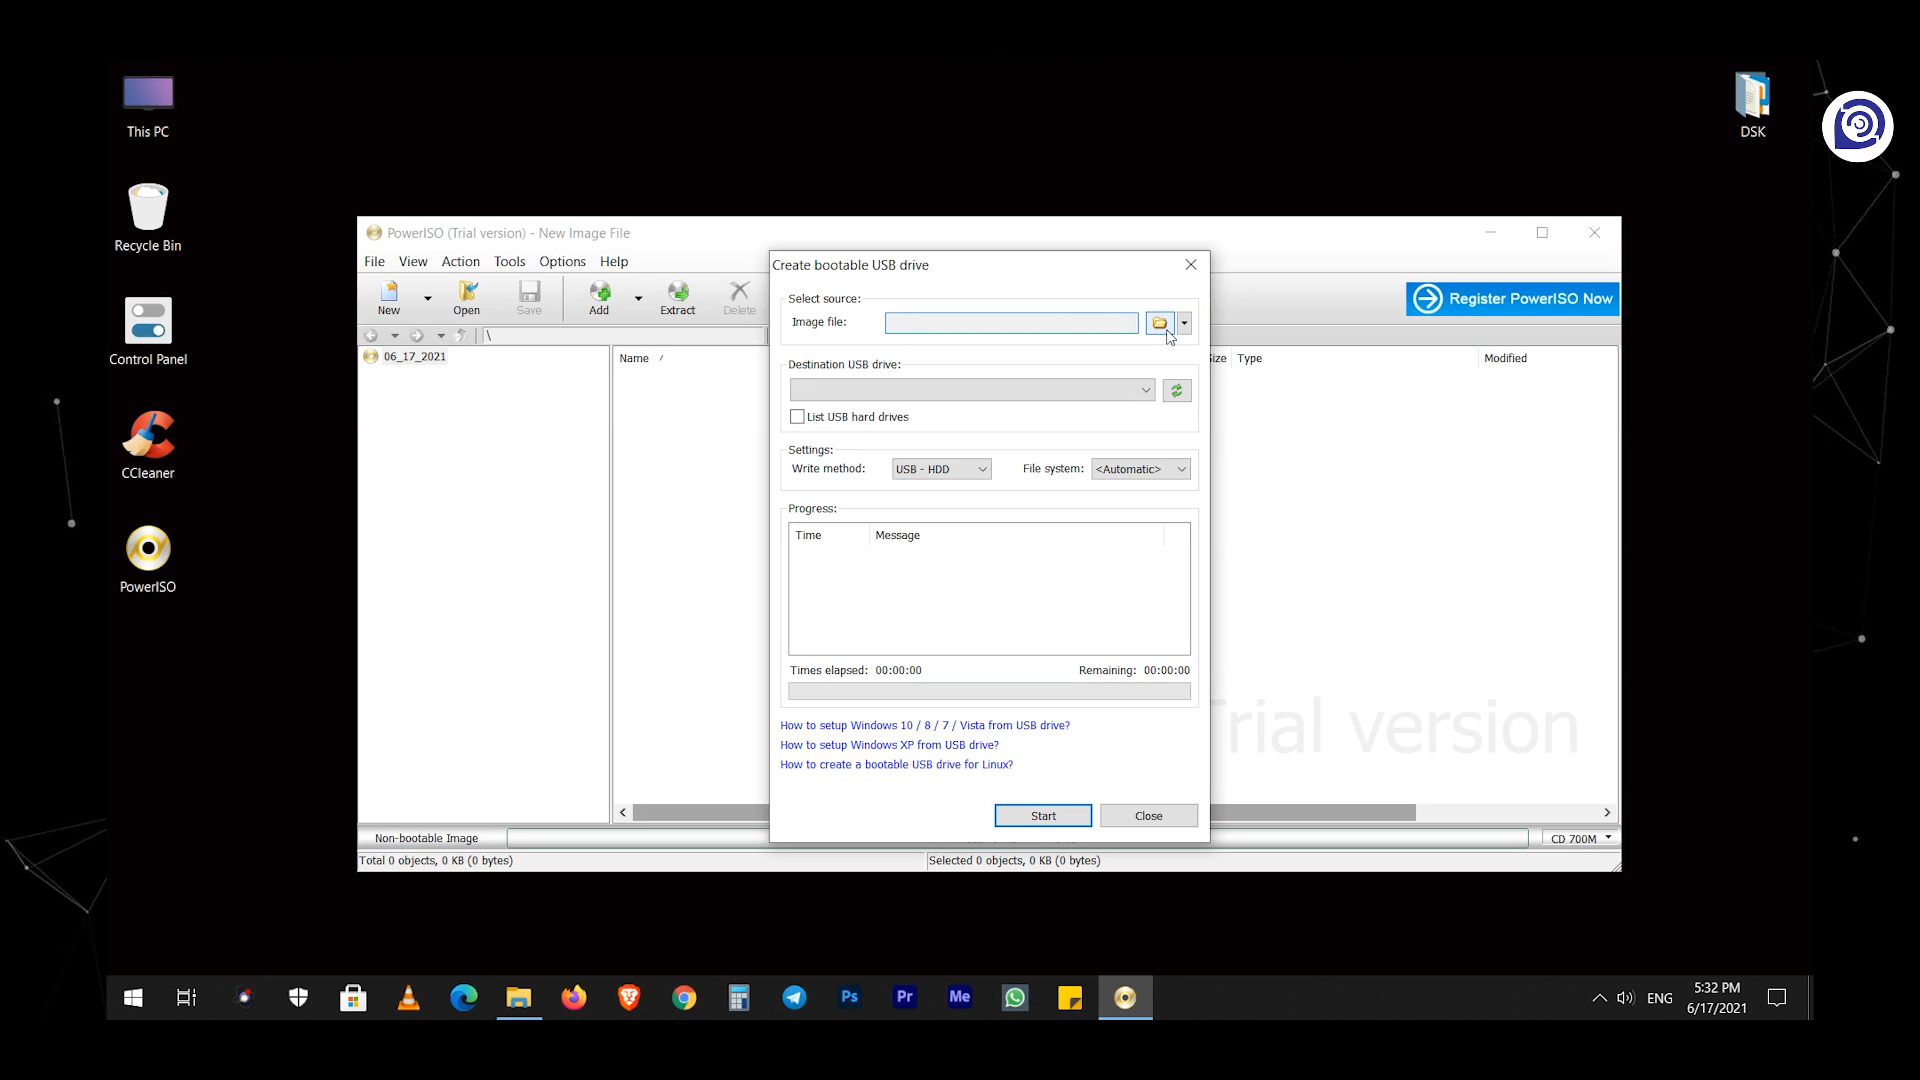
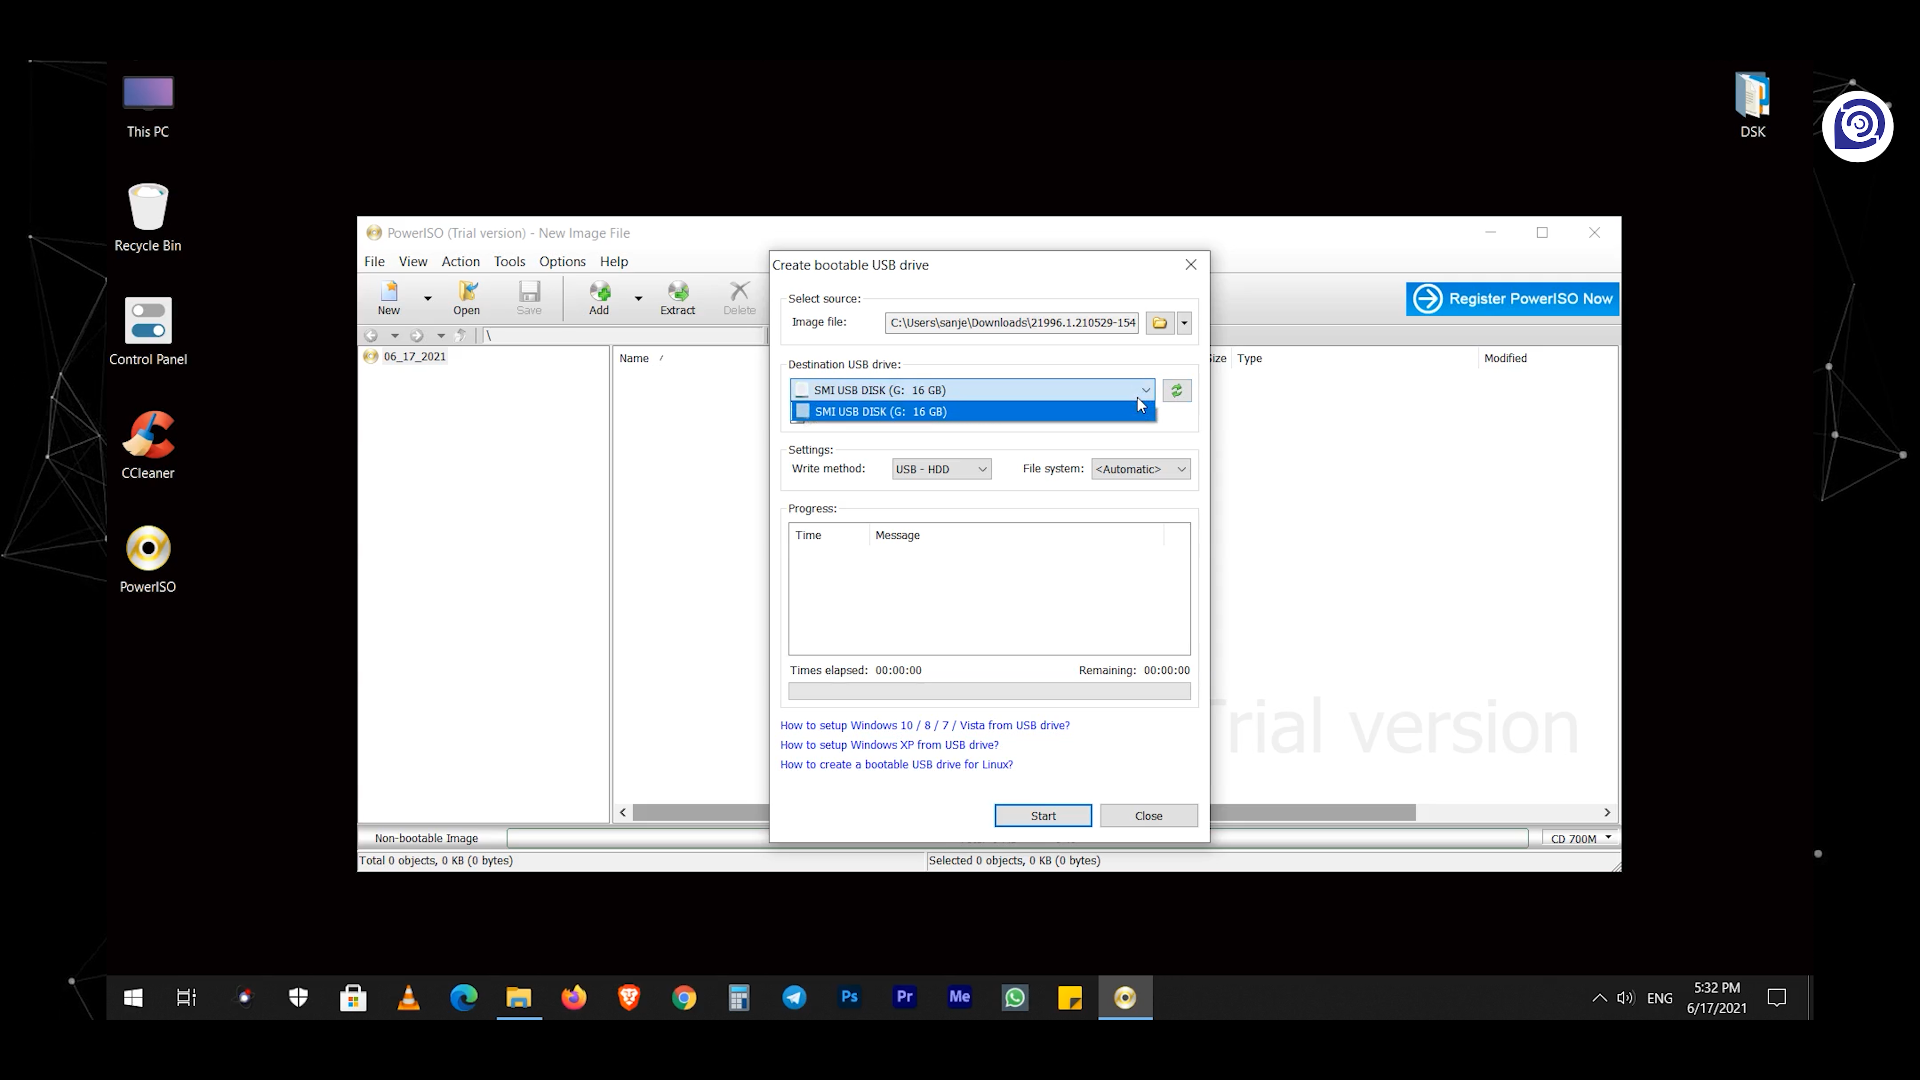
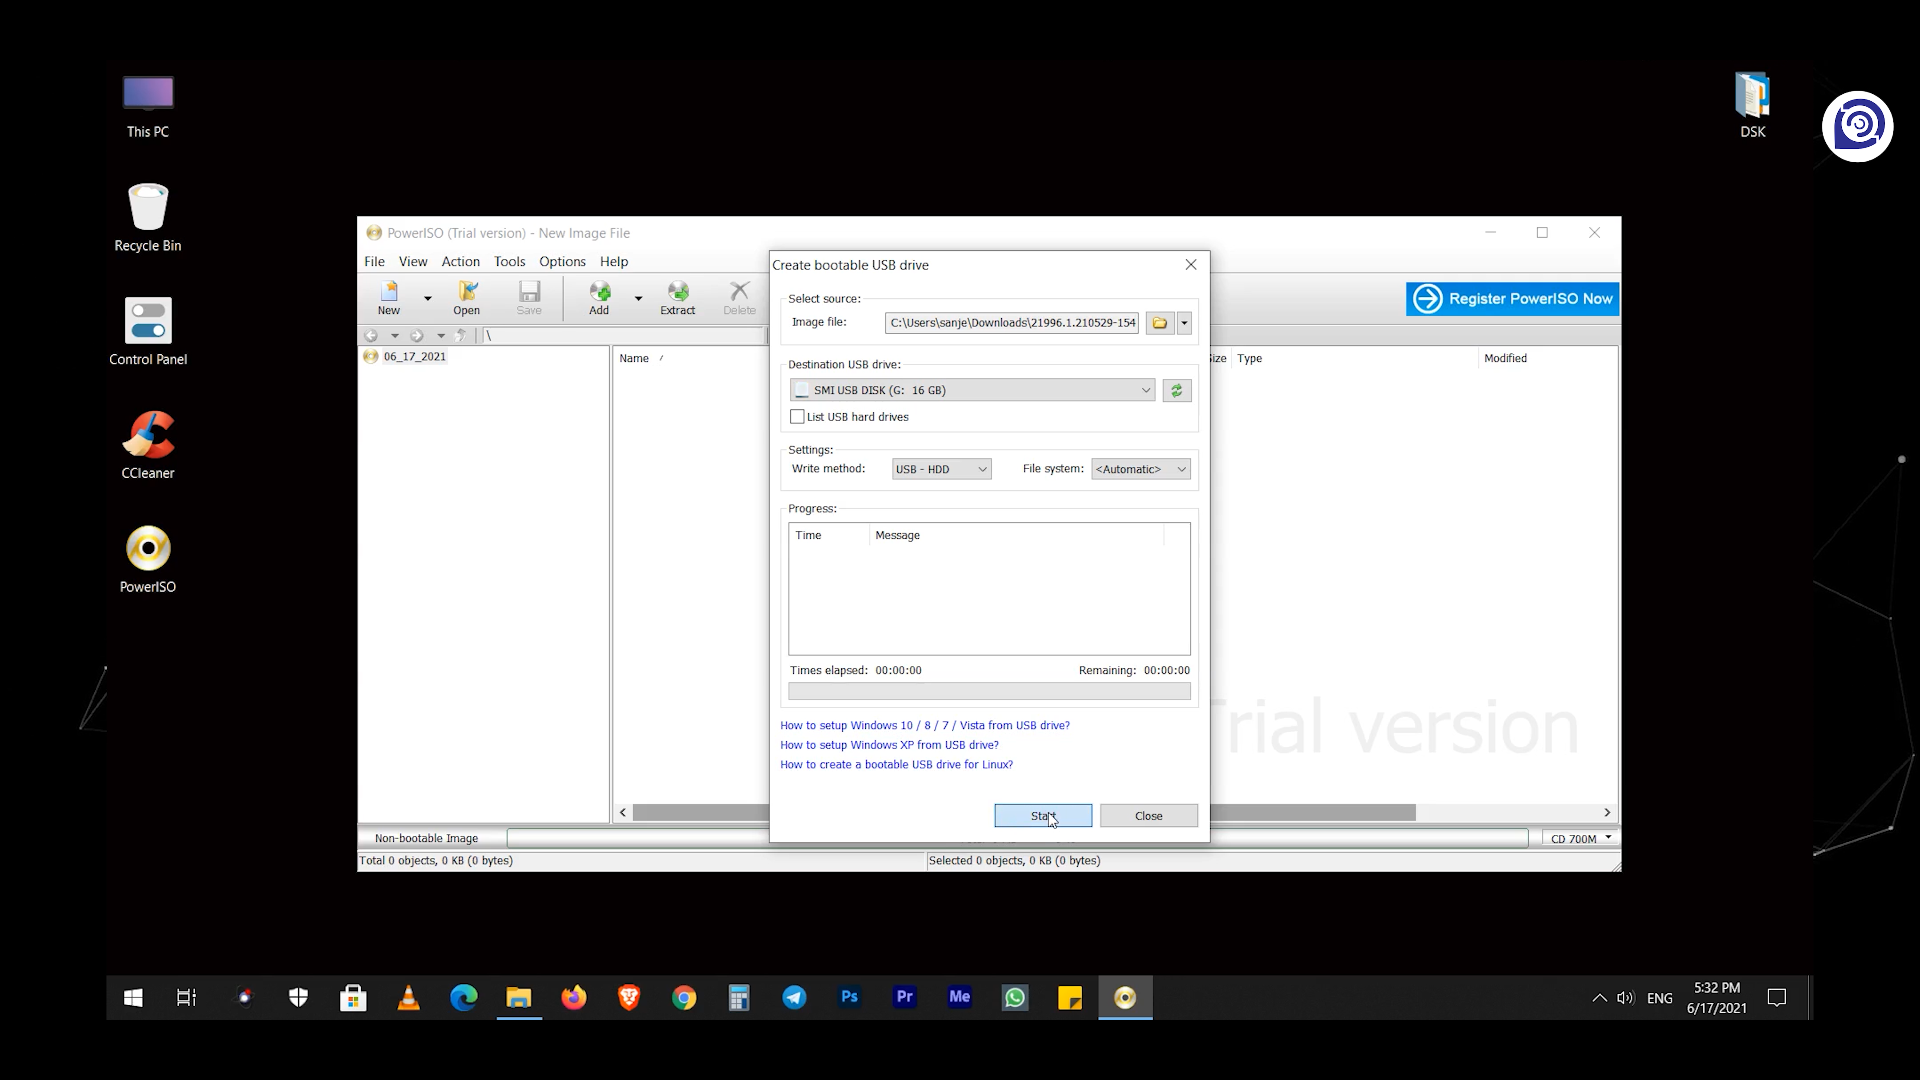
Now, plug in the empty Pendrive to your PC, and make sure you have selected the correct device over here, as it would do a format during the process.
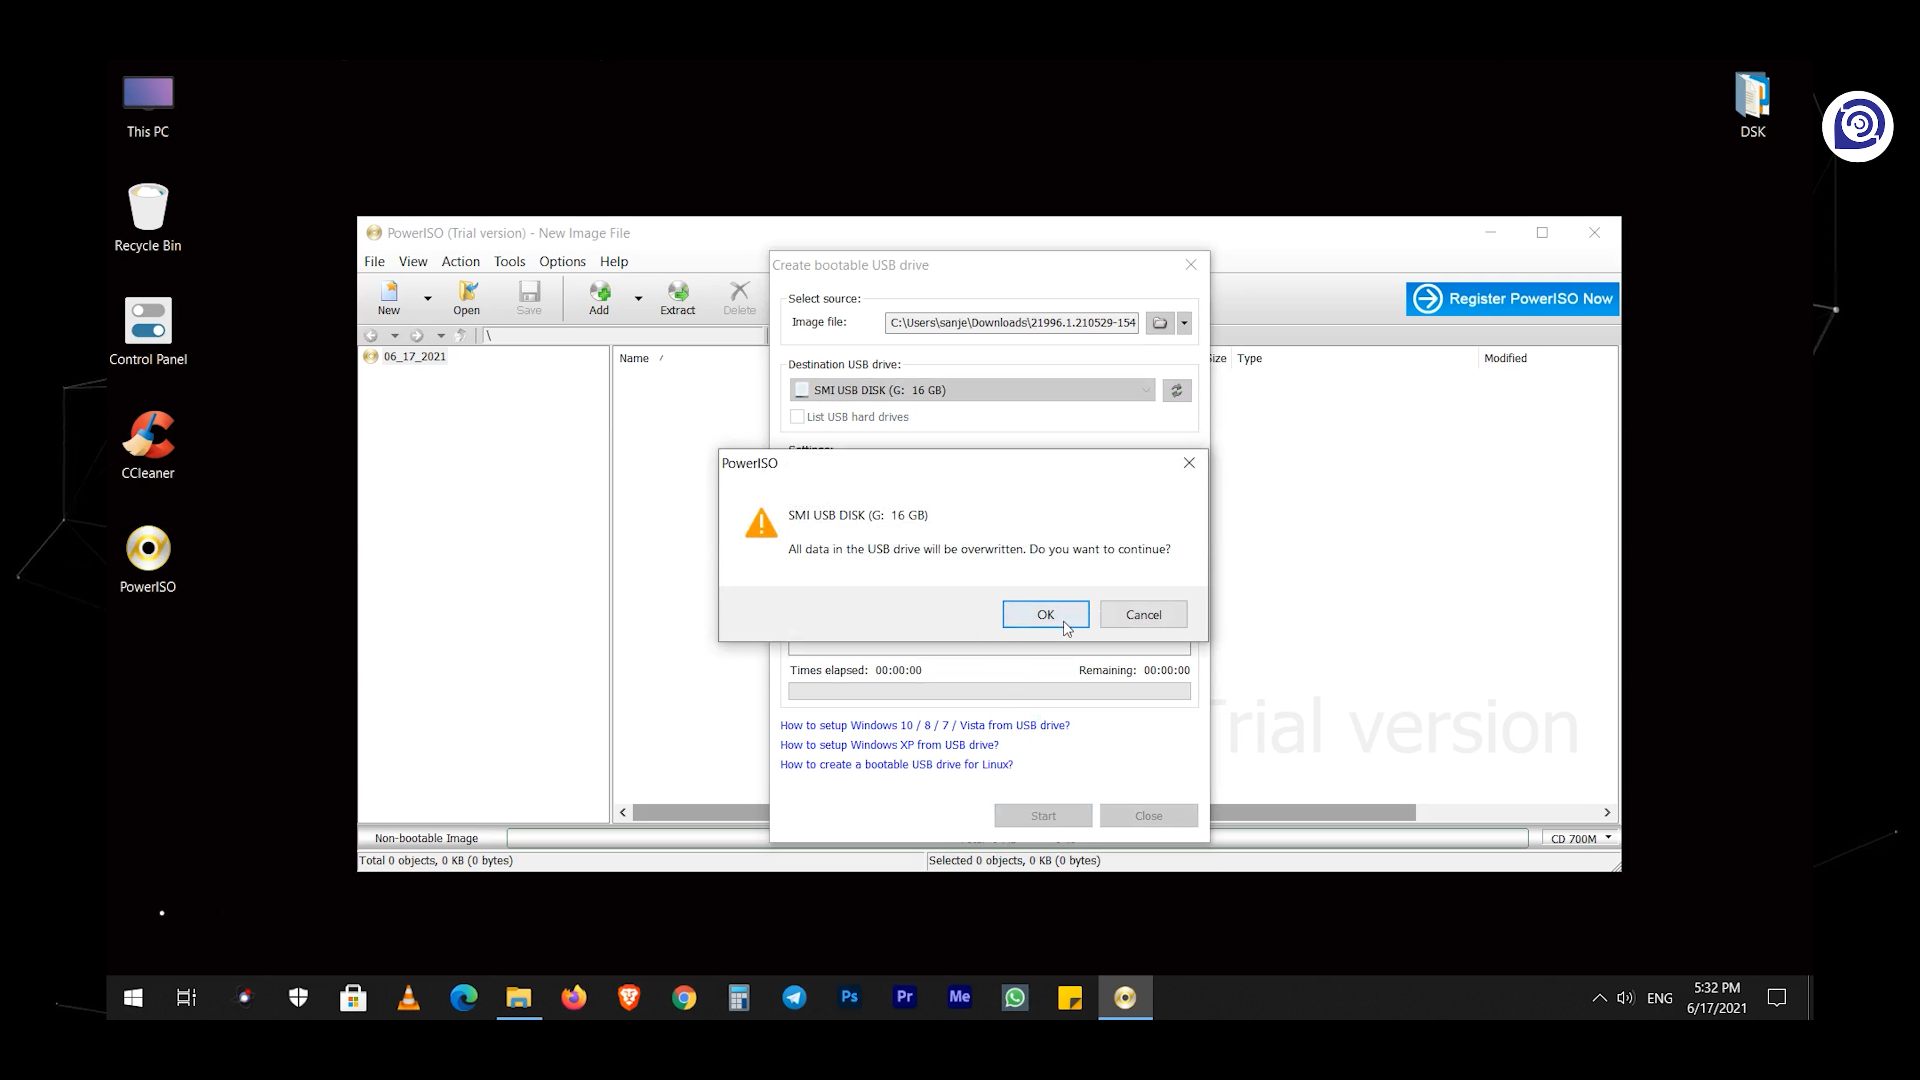
Then you will be getting a warning box mentioned data on the Pendrive would be overridden, Click ‘Ok’.
After it gets finished you would be seeing this dialogue box, click ‘Ok’.
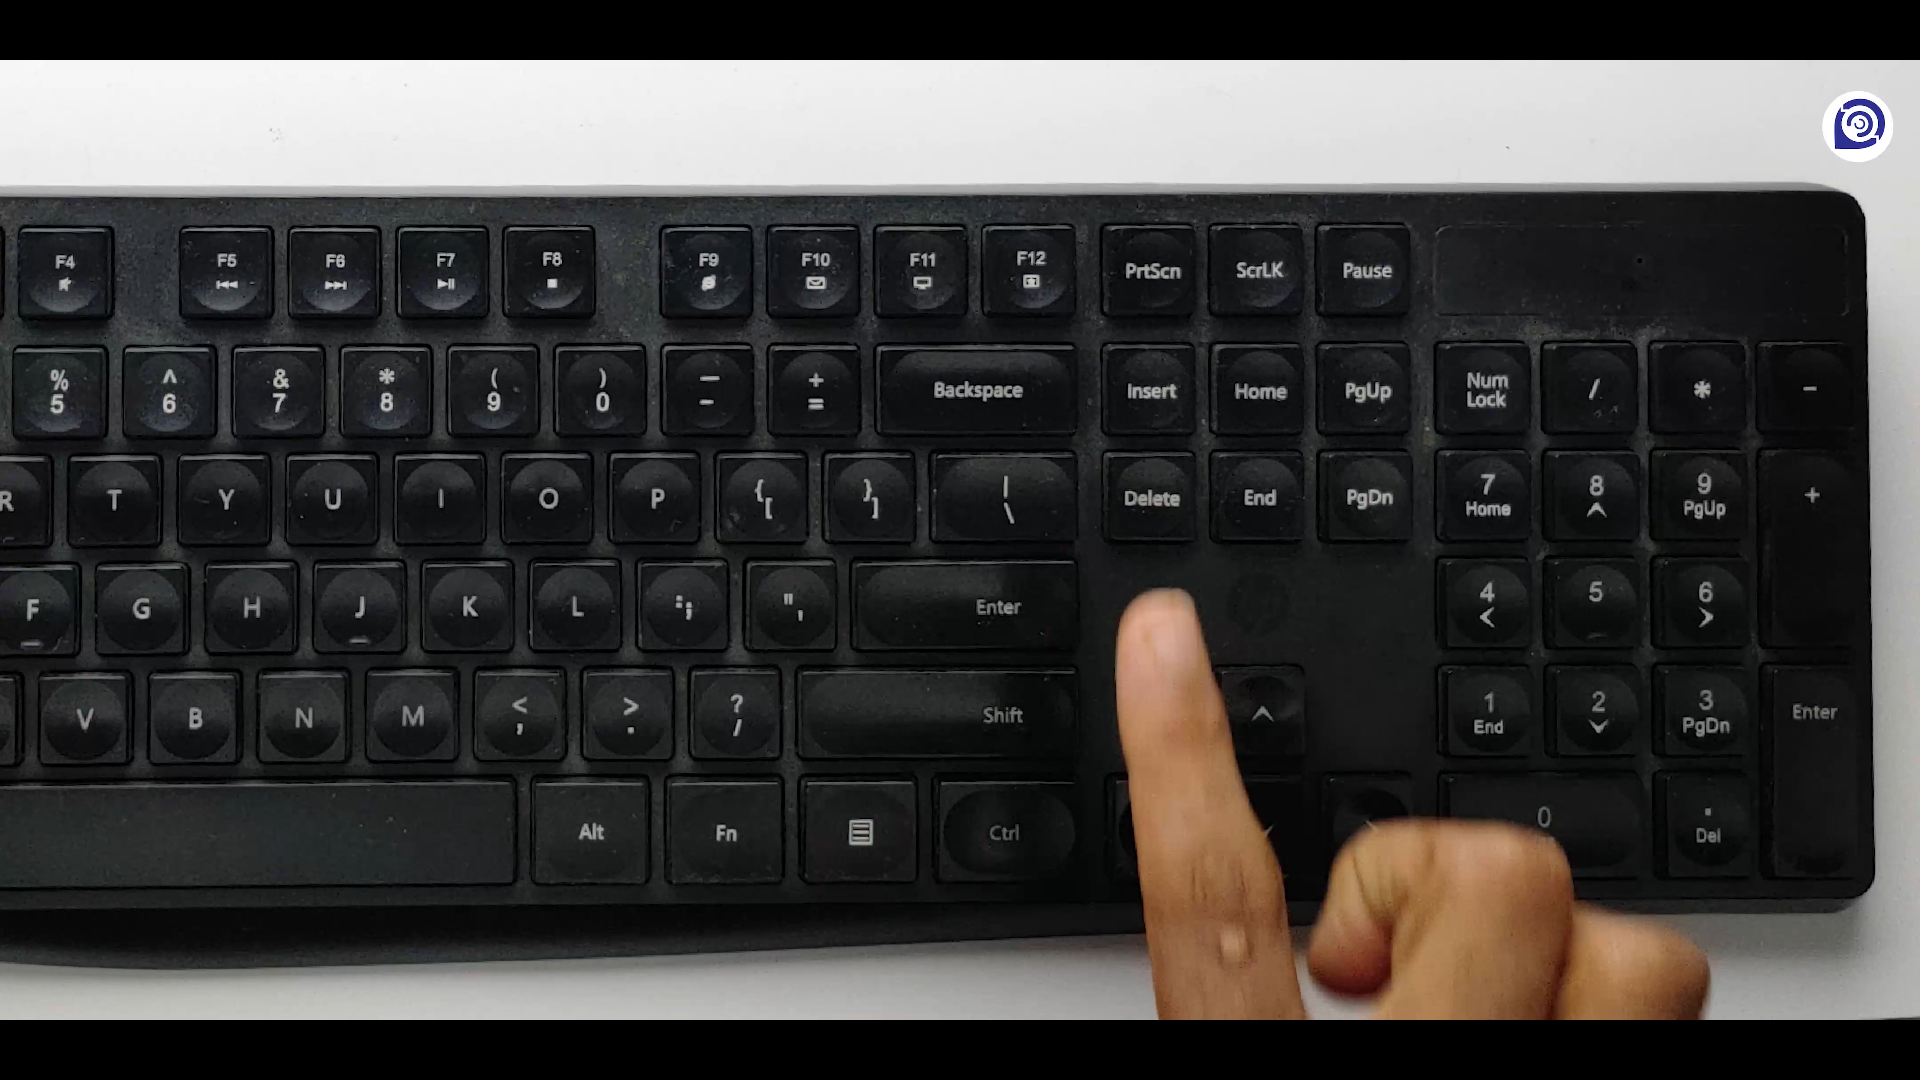
Here, every PC has a somewhat different method to get into BIOS settings. Some PCs get into BIOS settings by F12, for some it is F2. In my case, hitting the DEL button made the work. If you don’t know the BIOS key for your PC, try hitting each one of them or google the same.
Once you get into the BIOS, you have to know that most of the time mouse controls won’t work in BIOS, you have to use the keyboard instead. Follow the on-screen instructions to control and change the settings.
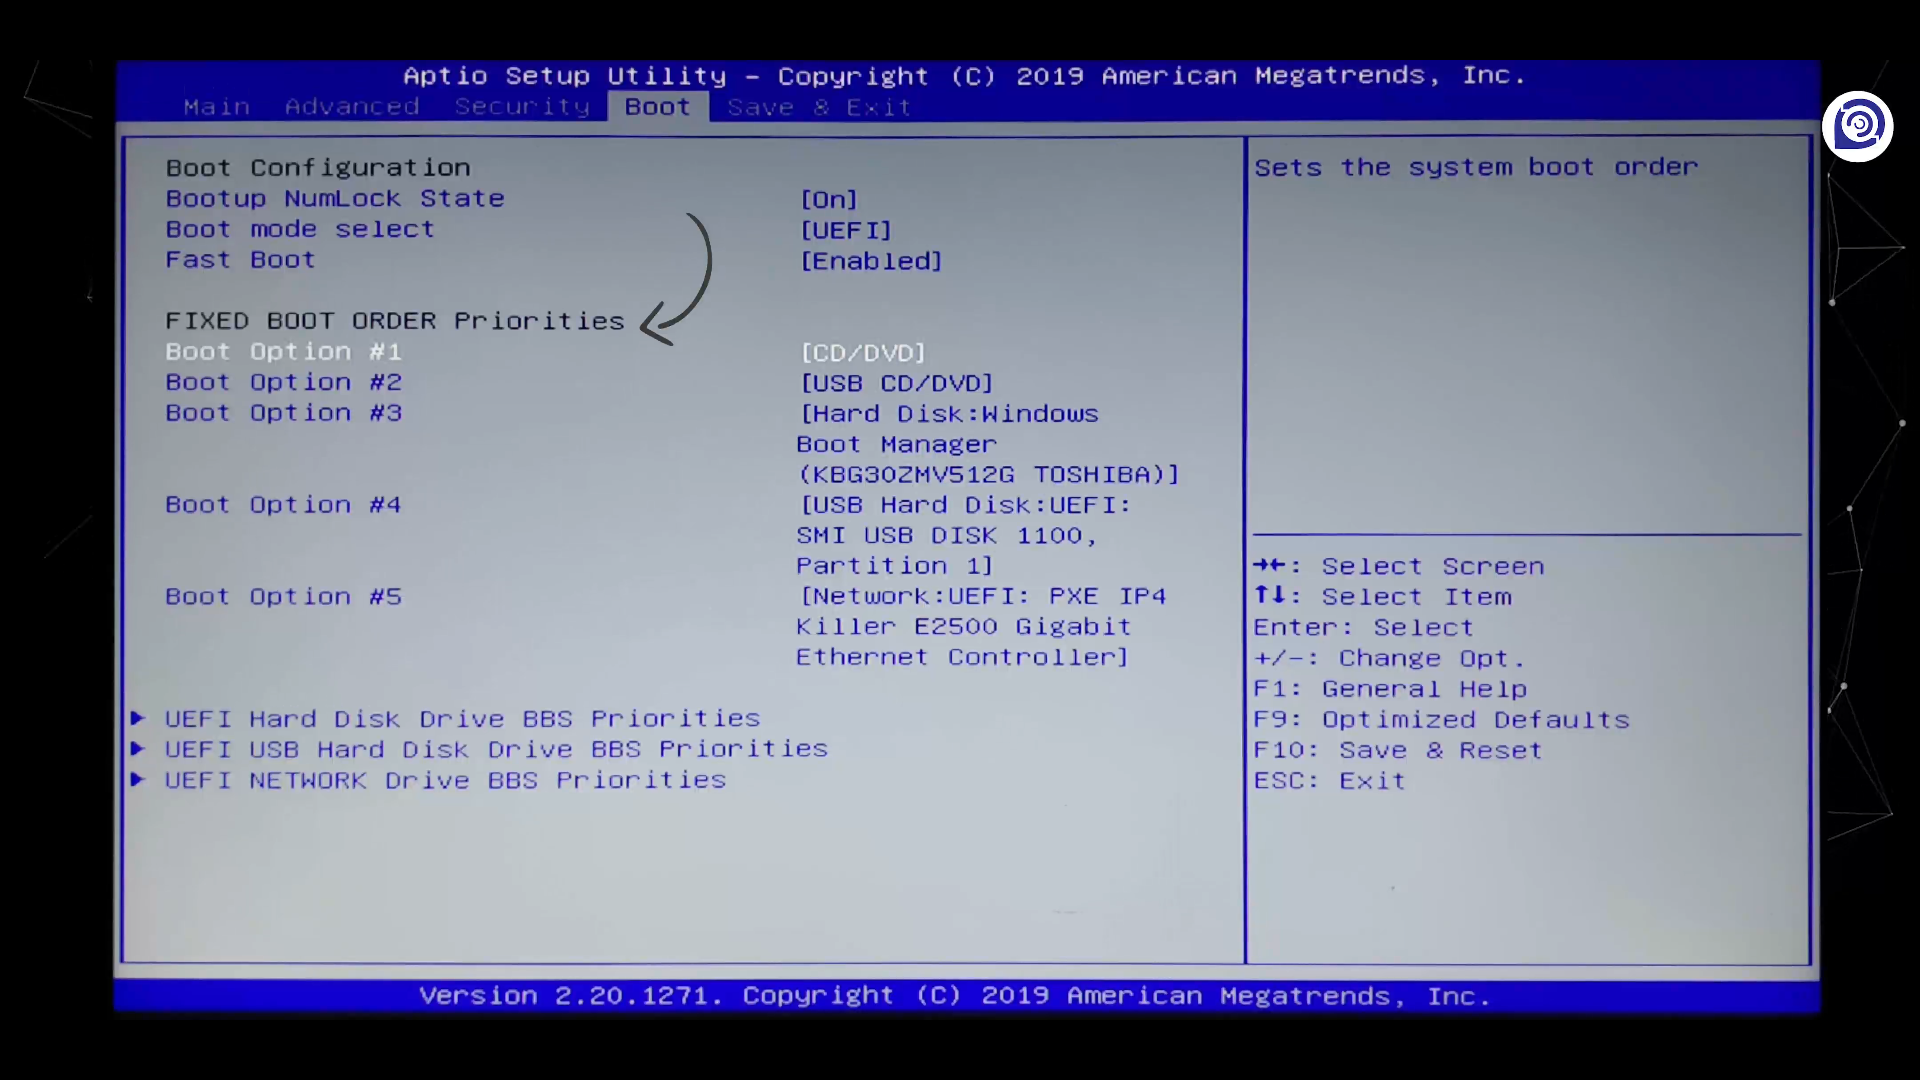
Now, you have to enable the ‘USB Boot’ option in the BIOS settings if disabled and prioritize your Pendrive over other devices available. To do that, get into the ‘Boot’ menu and find where you can set the device priority for booting.
As I said earlier, all the BIOS are different depending on the motherboard manufacturer. Some devices directly have ‘Boot Manager’ or ‘Boot Menu Property’ to change the first boot device.
After finding the same, set your Pendrive to be the first boot priority over the other devices available.
In my MSI laptop, I have the Boot Order Priorities right in the ‘Boot Menu’. Now we have to change the 1st Boot option to be the Bootable Pendrive we created earlier.
As mentioned before, we have to control and save the changes via the keyboard with the help of on-screen instructions. Once done, save the changes and restart your PC.
Give it a couple of seconds and you would be taken to the standard Windows installation wizard. Select the installation language and click ‘Next’.
Click on the ‘Install Now’ and enter the product key in the field, or, if you want to continue unregistered select ‘I don’t have a product key’ option.
Here we can see all the editions of Windows 11 listed. Select your preferred Windows edition.
Click on the ‘Custom: Installation’ option as we don’t already have Windows 11 installed.
Select the disk you want to install Windows 11 on and click ‘Next’.
After restarting you can see the updated Windows logo. Once everything loads, you can continue with the setup.
The setup process is pretty fluid and the graphic animations are smooth. The animations are way better than Windows 10 for sure.
Select your preferred settings for Windows accordingly by following the on-screen instructions. Again give it a couple of seconds to load the things for the first time. Here we can see the updated waiting page with animated particles in the background.
I hope this simple guide would surely help you if you want to easily install Windows 11 on your PC.
Here is the video version of the same above-mentioned guide on our own YouTube channel. Do watch it to get an easy understanding of the same.
Conclusion
Overall, that was how you can install the all-new Windows 11 right on your PC in the simplest way possible.
So, That was all about installing Windows 11 on any PC with a Pendrive. Keep supporting Techniverse Spotted for more cool and interesting stuff.















Post a Comment